浮动AppBar中的textField引起的滚动问题处理
完整问题描述
SliverAppBar的floating=true,pinned=false模式中嵌套的TextField,会在获取焦点时触发CustomScrollView滚动到顶部。
问题表现
CustomScrollView和SliverAppBar的介绍和演示,参见官方文档。
在floating=true和pinned=false 这两个组合参数的模式下,SliverAppBar表现为:列表向上滑动时随列表向上滑动直至消失。
列表在任何位置向下滑动时,会立即从上方滑入直至全部展现。
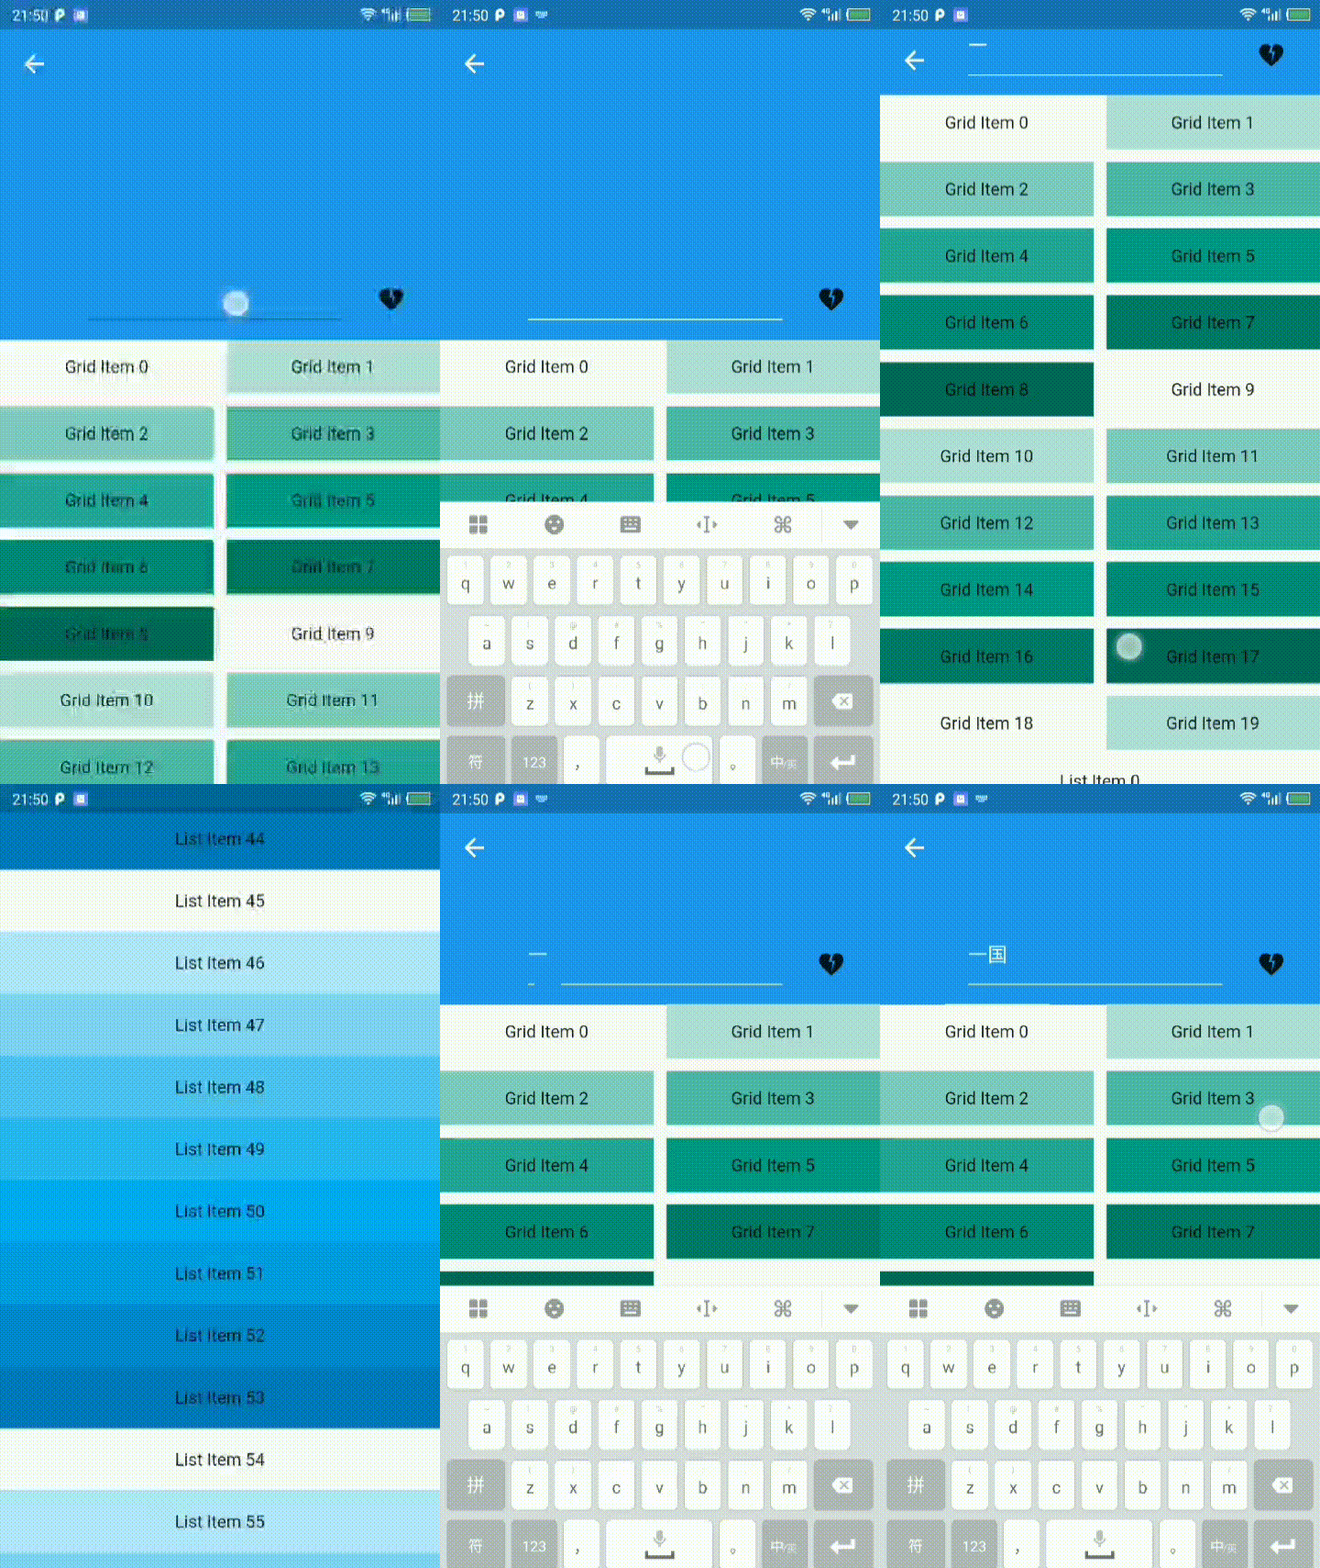
如果该组件内嵌套了TextField,在列表上滑一段距离,再下滑至SliverAppBar及其内嵌套的TextField出现时(此时列表尚未滑动到顶端),点击TextField使其获取焦点以输入文字,此时列表会立即滚动至顶。
如图:

初步探索
开始调试问题,尝试了各种参数组合,只要pinned为true就没有这个问题,因为SliverAppBar总会展现在最顶端。然后想到了在获取焦点的同时,将CustomScrollView的physics设置为 NeverScrollableScrollPhysics(意为禁止滚动),此时并不影响CustomScrollView的滚动位置,然后在输入完成或失去焦点时,再取消禁止滚动的状态,即可避免获取焦点时列表滚动至顶端的问题。解决代码如下:
class CustomScrollTextFieldPage extends StatefulWidget {
  const CustomScrollTextFieldPage({Key? key}) : super(key: key);

  @override
  State<CustomScrollTextFieldPage> createState() =>
      _CustomScrollTextFieldPageState();
}

class _CustomScrollTextFieldPageState extends State<CustomScrollTextFieldPage> {
  final textController = TextEditingController();
  final editableTextController = TextEditingController();

  bool focused = false;
  final focusNode = FocusNode();
  final buttonFocus = FocusNode();
  final textFocus = FocusNode();
  @override
  void initState() {
    super.initState();
    focusNode.addListener(_onFocus);
  }

  @override
  void dispose() {
    focusNode.removeListener(_onFocus);
    super.dispose();
  }

  _onFocus() {
    setState(() {
      focused = focusNode.hasFocus;
    });
  }

  @override
  Widget build(BuildContext context) {
    return Scaffold(
      body: GestureDetector(
        behavior: HitTestBehavior.translucent,
        onTapDown: () {
          FocusManager.instance.rootScope.requestFocus(FocusNode());
        },
        child: CustomScrollView(
          physics: focused ? const NeverScrollableScrollPhysics() : null,
          slivers: <Widget>[
            SliverAppBar(
              floating: true,
              pinned: false,
              expandedHeight: 250.0,
              flexibleSpace: FlexibleSpaceBar(
                expandedTitleScale: 1,
                title: Row(
                  crossAxisAlignment: CrossAxisAlignment.end,
                  children: [
                    Expanded(
                      child: TextField(
                        focusNode: focusNode,
                        controller: textController,
                        onEditingComplete: () {
                          focusNode.unfocus();
                          FocusManager.instance.rootScope.requestFocus();
                        },
                        style: const TextStyle(color: Colors.white),
                        decoration: const InputDecoration(
                          border: UnderlineInputBorder(
                            borderSide: BorderSide(color: Colors.white),
                          ),
                          focusedBorder: UnderlineInputBorder(
                            borderSide: BorderSide(color: Colors.white),
                          ),
                        ),
                      ),
                    ),
                    Padding(
                      padding: EdgeInsets.symmetric(horizontal: 16),
                      child: IconButton(
                        visualDensity:
                            VisualDensity(horizontal: 0, vertical: -4),
                        padding: EdgeInsets.zero,
                        onPressed: () {
                          print('btn clicked');
                          buttonFocus.requestFocus();
                        },
                        focusNode: buttonFocus,
                        icon: Icon(Icons.heart_broken),
                      ),
                    )
                  ],
                ),
              ),
            ),
            SliverGrid(
              gridDelegate: const SliverGridDelegateWithMaxCrossAxisExtent(
                maxCrossAxisExtent: 200.0,
                mainAxisSpacing: 10.0,
                crossAxisSpacing: 10.0,
                childAspectRatio: 4.0,
              ),
              delegate: SliverChildBuilderDelegate(
                (BuildContext context, int index) {
                  return Container(
                    alignment: Alignment.center,
                    color: Colors.teal[100 * (index % 9)],
                    child: Text('Grid Item $index'),
                  );
                },
                childCount: 20,
              ),
            ),
            SliverFixedExtentList(
              itemExtent: 50.0,
              delegate: SliverChildBuilderDelegate(
                (BuildContext context, int index) {
                  return Container(
                    alignment: Alignment.center,
                    color: Colors.lightBlue[100 * (index % 9)],
                    child: Text('List Item $index'),
                  );
                },
              ),
            ),
          ],
        ),
      ),
    );
  }
}
这个解决方法有点不完美的表现,就是输入完成时不点击页面,而是直接点击收起键盘,这时不会触发onTapDown也不会触发 onEditingComplete ,就需要在屏幕再点击或者滑动时才能重置列表的可滚动状态。
更好的解决办法
经过进一步测试,发现在输入框内的EditableText中对focus进行了监听,在获取焦点时递归调用了RenderObject的showOnScreen方法,会一直向上追溯Render树,最终调用到RenderSliverList中,触发了滚动事件。
是不是可以在TextField外包裹一个自定义了RenderBox的组件,把这个showOnScreen调用给切断呢?于是翻了下官方的几个组件写法,照猫画虎写了个自定义的组件
class IgnoreShowOnScreenWidget extends SingleChildRenderObjectWidget {
  const IgnoreShowOnScreenWidget({
    Key? key,
    Widget? child,
    this.ignoreShowOnScreen = true,
  }) : super(key: key, child: child);

  final bool ignoreShowOnScreen;

  @override
  RenderObject createRenderObject(BuildContext context) {
    return IgnoreShowOnScreenRenderObject(
      ignoreShowOnScreen: ignoreShowOnScreen,
    );
  }
}

class IgnoreShowOnScreenRenderObject extends RenderProxyBox {
  IgnoreShowOnScreenRenderObject({
    RenderBox? child,
    this.ignoreShowOnScreen = true,
  });

  final bool ignoreShowOnScreen;

  @override
  void showOnScreen({
    RenderObject? descendant,
    Rect? rect,
    Duration duration = Duration.zero,
    Curve curve = Curves.ease,
  }) {
    if (!ignoreShowOnScreen) {
      return super.showOnScreen(
        descendant: descendant,
        rect: rect,
        duration: duration,
        curve: curve,
      );
    }
  }
}
使用方法
class CustomScrollTextFieldPage extends StatefulWidget {
  const CustomScrollTextFieldPage({Key? key}) : super(key: key);

  @override
  State<CustomScrollTextFieldPage> createState() =>
      _CustomScrollTextFieldPageState();
}

class _CustomScrollTextFieldPageState extends State<CustomScrollTextFieldPage> {
  final textController = TextEditingController();

  final focusNode = FocusNode();

  @override
  Widget build(BuildContext context) {
    return Scaffold(
      body: GestureDetector(
        behavior: HitTestBehavior.translucent,
        onTap: () {
          FocusManager.instance.rootScope.requestFocus(FocusNode());
        },
        child: CustomScrollView(
          slivers: <Widget>[
            SliverAppBar(
              floating: true,
              pinned: false,
              expandedHeight: 250.0,
              flexibleSpace: FlexibleSpaceBar(
                expandedTitleScale: 1,
                title: Row(
                  crossAxisAlignment: CrossAxisAlignment.end,
                  children: [
                    Expanded(
                      child: IgnoreShowOnScreenWidget(
                        child: TextField(
                          focusNode: focusNode ,
                          controller: textController ,
                          style: const TextStyle(color: Colors.white),
                          decoration: const InputDecoration(
                            border: UnderlineInputBorder(
                              borderSide: BorderSide(color: Colors.white),
                            ),
                            focusedBorder: UnderlineInputBorder(
                              borderSide: BorderSide(color: Colors.white),
                            ),
                          ),
                        ),
                      ),
                    ),
                    Padding(
                      padding: EdgeInsets.symmetric(horizontal: 16),
                      child: IconButton(
                        visualDensity:
                            VisualDensity(horizontal: 0, vertical: -4),
                        padding: EdgeInsets.zero,
                        onPressed: () {
                          print('btn clicked');
                        },
                        icon: Icon(Icons.heart_broken),
                      ),
                    )
                  ],
                ),
              ),
            ),
            SliverGrid(
              gridDelegate: const SliverGridDelegateWithMaxCrossAxisExtent(
                maxCrossAxisExtent: 200.0,
                mainAxisSpacing: 10.0,
                crossAxisSpacing: 10.0,
                childAspectRatio: 4.0,
              ),
              delegate: SliverChildBuilderDelegate(
                (BuildContext context, int index) {
                  return Container(
                    alignment: Alignment.center,
                    color: Colors.teal[100 * (index % 9)],
                    child: Text('Grid Item $index'),
                  );
                },
                childCount: 20,
              ),
            ),
            SliverFixedExtentList(
              itemExtent: 50.0,
              delegate: SliverChildBuilderDelegate(
                (BuildContext context, int index) {
                  return Container(
                    alignment: Alignment.center,
                    color: Colors.lightBlue[100 * (index % 9)],
                    child: Text('List Item $index'),
                  );
                },
              ),
            ),
          ],
        ),
      ),
    );
  }
}
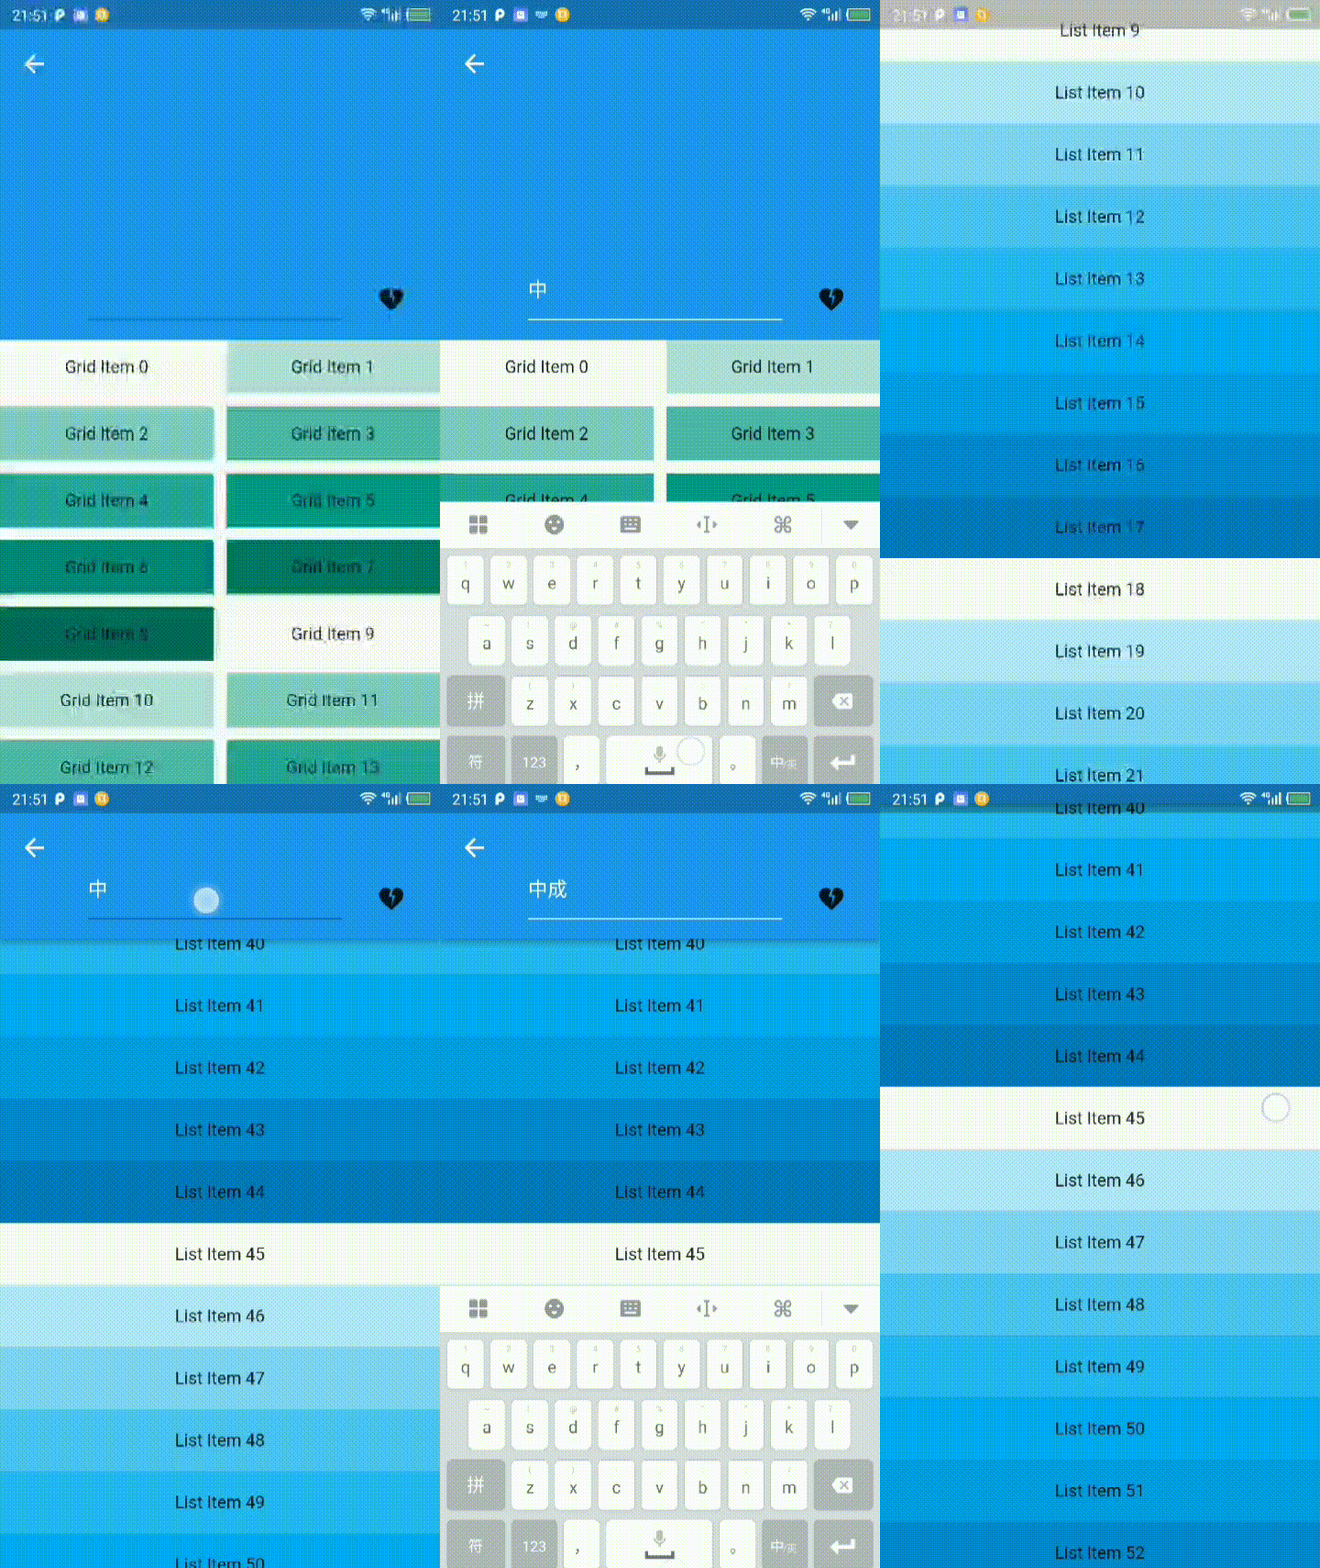
初步尝试,确实可以更方便地解决问题。
效果如图:

目前还未发现有什么弊端,如果哪位大神有更好的解决办法,欢迎留言讨论!